[:en]
1 – Webduino Smart / Introduction et paramétrage
I ) Introduction
Webduino Smart can be connect with Wi Fi and use in both Internet Protocol and WebSocket Protocol, for create Internet of Things project.
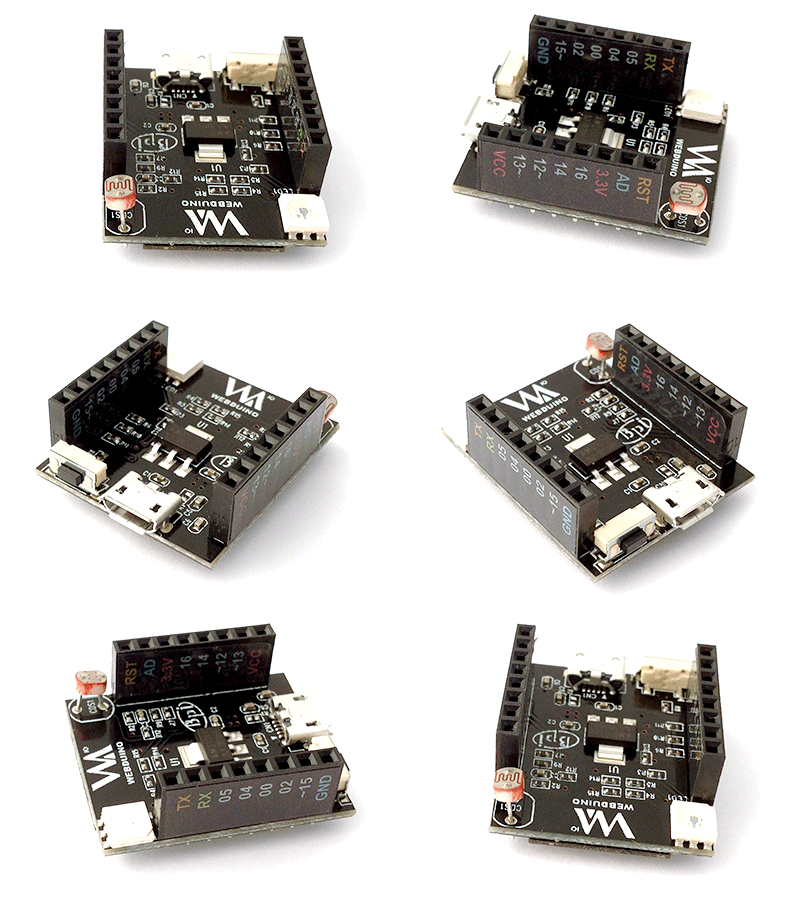
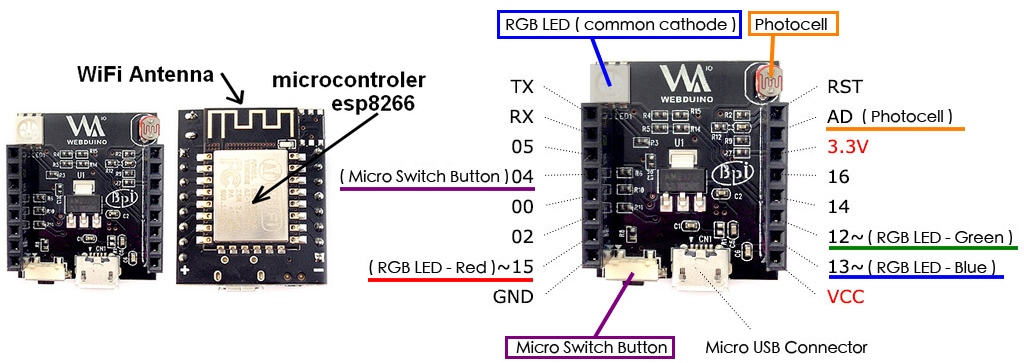
Webduino Smart has a photocell sensor, an RGB LED, and a micro switch button onboard.
The photocell is connected to the AD pin,
and the RGB (Red, Geen, Blue) LED is connected to pins 15, 12, and 13 respectively )
(The LED is a common cathode)
And the micro switch button is connected to pin 4.
II ) Wi Fi Setup
Step 1: Plug In, and Enter the SSID & Password
a ) Provide power to your Webduino Smart so the board can be found on your PC, laptop, or mobile device.
(At first the red light on the board will blink, then it will stay on once it is ready.)
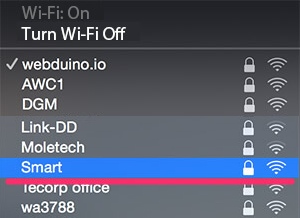
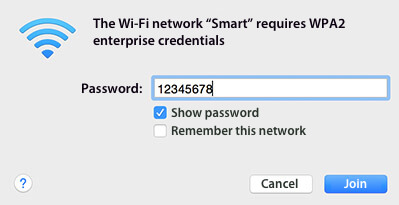
b ) Connect to « Smart » by Wi-Fi, and type in the default password of 12345678. Now the board will be connected.
Step 2: Set Up SSID & Password for Wi-Fi, and Device ID
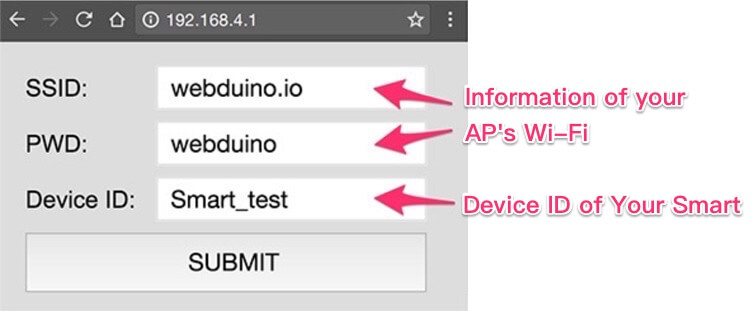 a ) Open your internet browser (we recomend you use Chrome) and type 192.168.4.1 into the address bar. You will be directed to the setup page for the Webduino Smart.
Fill in the Wi-Fi information and router ID.
The SSID & PW is referring to your AP’s Wi-Fi.
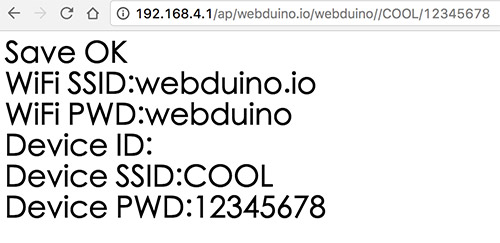
b ) Press the « Submit » button, and the setup is successful when « Save OK » is showed on the screen.
Step 3: Connect to network wifi LAN
After you have a successfully completed Steps 1 & 2 and Wi-Fi is setup, remove the power to your Webduino Smart, then plug it in again.
The red light on your board will not stop blinking until your board has connected to your wifi LAN. Once it connects to LAN, the green light will flash.
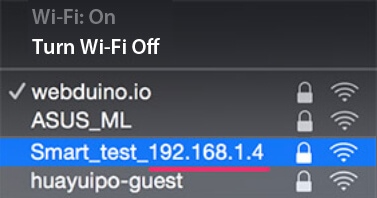
Now you can find Smart_your device ID_192.168.XXX.XXX under your Wi-Fi access points.
Please take note of the IP address, which is the IP you need to use WebSocket protocol.
If the red light does not stop blinking, you need to restart the setup from Step 1.
You can program now your Webduino smart with blockly at this address blockly.webduino.io
Update Firmware Through the Internet
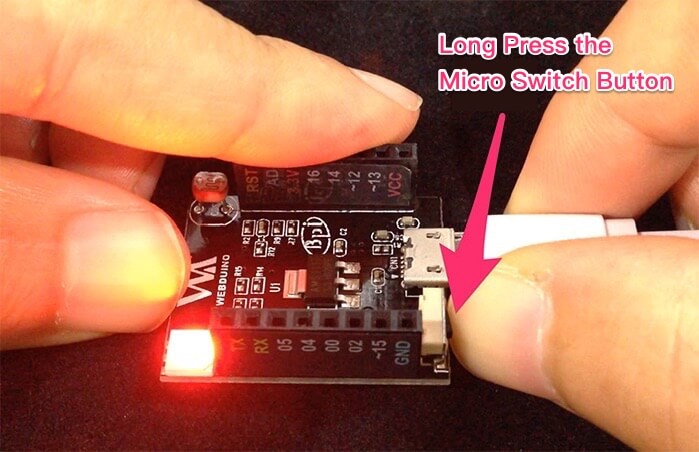
Once you’ve successfully completed Step 3, which means your Webduino Smart is able to connect to Internet, you can easily update the firmware on your Webduino Smart.
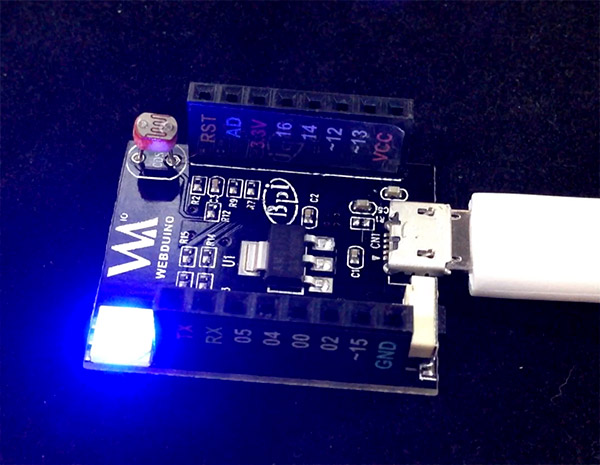
While connected to power, PRESS and HOLD the Micro Switch button until the blue light comes on. This will update the firmware.
After finishing the update, the blue light will turn off and the red light will blink, showing that it is connecting. Finally, a burst of green light means you can start using your Webduino Smart with updated firmware.
1 – Webduino Smart / Introduction et paramétrage
使用 Webduino Smart 之前,最重要的就是進行初始化設定,初始化設定的目的在於讓 Webduino 開發板可以自動上網 ( Internet ),或是在區域網路透過 WebSocket 連線,有了初始化設定,我們也能夠自訂開發板的顯示名稱和密碼,更可以連上 internet 進行遠端更新
The video below create by Webduino compagny click on their logo ![]() have move information and vidéo for use Webduino smart.
have move information and vidéo for use Webduino smart.
Webduino Smart 影片介紹
初始化設定步驟:
第一次雲端更新 + 取得 Device ID:
More information in official website of manufacturer https://webduino.io/tutorials/smart-02-setup.html
0 commentaires
1 – Webduino Smart / Introduction et paramétrage

I ) Introduction
La carte Webduino Smart peut se connecter via Wi-Fi et utiliser les protocoles (langage) Internet protocole (IP) et Websocket, pour créer un internet des objets.
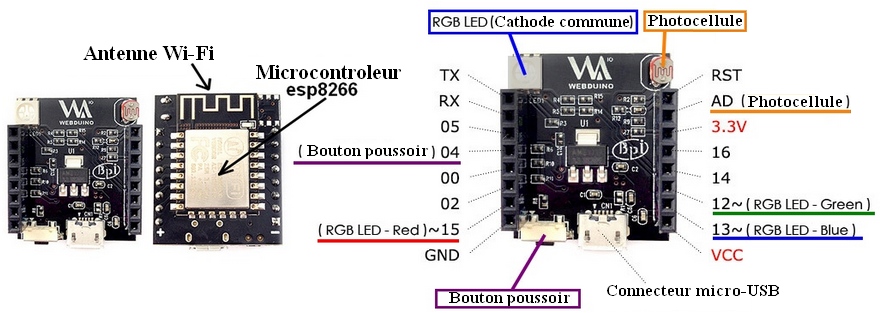
Webduino Smart a un capteur photosensible (capteur de luminosité) intégré ainsi qu’une D.E.L RGB (Diode Electroluminescente 3 couleurs) et un petit bouton poussoir.
La photocellule intégrée est connectée à la broche AD,
et la D.E.L RGB (Red, Geen, Blue) est connectée au broches 15, 12, et 13 (La Led est branchée avec une cathode commune)
Et le petit bouton poussoir est lui connecté à la broche 4.
Les broches TX et RX permettent de faire communiquer Webduino smart avec d’autres cartes électroniques ( arduino, raspberry … ) avec une liaison série.
Il reste donc de libre les broches 0, 2, 5, 14, 16 pour brancher des capteurs et actionneurs externes
II ) Paramétrage du Wi Fi
Etape 1 : Branchez, puis entrez le SSID et le mot de passe

a ) La carte électronique à besoin de 5v pour fonctionner donc vous pouvez l’alimenter via la prise micro-usb à une alimentation de téléphone portable ou un ordinateur.
( Au début la lumière rouge de la carte clignote, puis reste fixe quand c’est prêt )
b ) Connectez vous à la carte en Wi-Fi celle ci a le SSID « Smart » le mot de passe par defaut est 12345678.

Etape 2 : Mettre le SSID et mot de passe wifi de votre box dans la carte webduino smart puis choisissez lui un identifiant (Device ID)

a ) Démarrer votre navigateur internet ( de préférence google Chrome) et tapez l’adresse IP 192.168.4.1 dans l barre d’adresse.
Vous allez être dirigé vers la page de paramétrage ci-contre de Webduino smart.
Indiquez les paramètres SSID et mot de passe de votre routeur Wi-Fi (ou box internet) dans la carte. Ainsi qu’un identifiant permettant de différencier cette carte par rapport à d’autre Webduino smart.
b ) Pressez le bouton « Submit » et le paramétrage est terminé quand « Save OK » apparaît sur l’écran.

Etape 3 : Se connecter en réseau par Wi-Fi à votre carte Webduino smart

Après avoir réalisé les étapes 1 et 2, quand le Wi-Fi est paramétré, enlevez l’alimentation de votre Webduino smart et remettez la pour faire redémarrer la carte.
La lumière rouge de la carte va clignoter jusqu’à ce celle ci se connecte au réseau wi-fi LAN. Quand la connexion est établie la lumière verte va clignoter.
Maintenant vous pouvez trouver Smart_your device ID_192.168.XXX.XXX dans la liste de vos accès Wi-Fi
C’est cette adresse IP Commençant par 192.168 qui sera utilisé dans la programmation Blockly cette adresse IP utilise le protocole Websocket pour faire communiquer des objets avec le web.
Si la lumière rouge de la carte n’arrête pas de clignoter, il faut redémarrer le processus à l’étape 1
Vous pouvez maintenant commençer à programmer votre carte Webduino smart en allant à cette adresse blockly.webduino.io
Mettre à jour le Firmware (microprogramme ) de la carte via internet

Si vous avez été jusqu’à l’étape 3, cela signifie que votre carte webduino smart est capable de se connecter à internet, il est donc facile de mettre à jour le firmware.
Pour cela il faut presser et maintenir le micro bouton, jusqu’à ce que la lumière devienne bleue, cela va mettre à jour le firmware.
Après la mise à jour, la lumière va passer du bleu au rouge clignotant. Quand la lumière rouge va cesser de clignoter et devenir verte, vous pourrez de nouveau utiliser votre webduino smart mise à jour.


0 commentaires